Leveraging Visual Studio Code, I dove into the integration of Jupyter notebooks for an enhanced coding environment, bridging my work in Ruby with the advanced capabilities of notebook interfaces. I recently wrote about using single-file throwaway code to complete one-off tasks or for use as a sandbox to explore new tech. In a sense, I use throwaway code to slap together a lower fidelity REPL environment.
← View previous articles in this series:
Writing Throwaway Code, Part I: A file at a time using Ruby and Bundler inline
Much higher on the fidelity gradient are notebooks interfaces, like Jupyter notebooks. Jupyter notebooks use Python as the base for creating an impressive literate programming environment. Up until now, I hadn’t taken the dive into notebooks because I spend most of my time in Ruby, not Python. Also, Jupyter is a separate environment, browser-based, and I like to edit code in an editor with syntax highlighting.
However, Visual Studio Code introduced Jupyter-compatible notebook support recently so I figured now was the time to take the plunge. There’s no need to install the Jupyter Notebook environment itself; Visual Studio Code implements a compatibility layer with the help of an extension.
For this setup, you need Visual Studio Code and a Ruby environment where you’re able to install Gems. My workstation is a MacBook with Ruby installations managed by asdf, and Visual Studio Code. I’ve also got a Windows 10 setup with WSL2 Ubuntu and Ruby installed there. I was able to get this going quickly in both environments by taking the following steps:
- From your target ruby version, install the IRuby gem:
gem install iruby; This gem provides a Jupyter notebook kernel that we’ll use from Visual Studio Code. - Now “register” the iruby kernel:
iruby register. What are you registering with? Nothing yet actually, but it’s creating config files on your system that VSCode (or an install of Jupyter Notebook) will pick up. - Fire up VSCode and install the Jupyter extension
- In Visual Studio Code choose File->New File… and select “Jupyter Notebook” from the popup.
- In the right hand side of the new
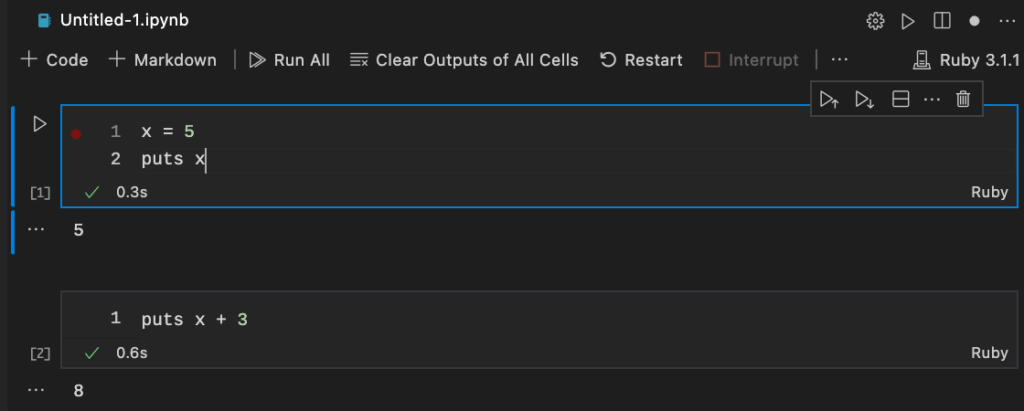
Untitled-1.ipynbpanel, you should seeSelect Kernel. Click that and you should see your installed version of Ruby X.Y.Z that you should select. - You should see a code box. You can type Ruby code in there, click the play icon and see the results displayed below. Of course, you gotta type
puts "hello world"first:

I’m far from an expert on Jupyter Notebooks, but after playing around it becomes clear that you add blocks of either Markdown or executable code. Blocks of code are intended to run from top to bottom, and variables declared in earlier blocks become available in subsequent blocks.

What’s very nice is that your running stack remains “alive” in the background. I can tweak an arbitrary block of code without needing to re-execute the blocks above. The value of x is remembered during a session.

Migrating From Single File Playground to Notebook
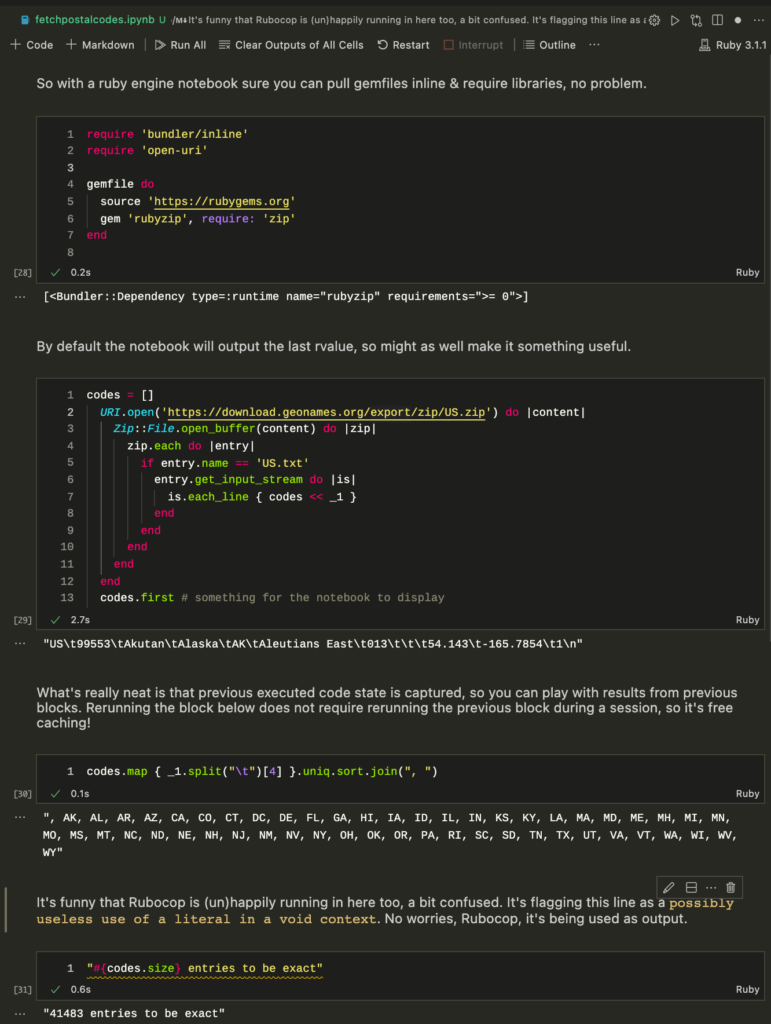
In a previous journal entry, I put together a small single-file Ruby solution that downloads a publicly available zipped CSV of US postal codes, and summarizes the states and localities in the dataset. I used a file caching gem to “remember” steps along the way so that I could tweak later steps without needing to re-download and unzip the file on every run.
Converting that single-file exercise into a Ruby notebook was remarkably easy and allowed me to drop the caching gem to boot.

I can click Run All to get everything set — primarily the codes variable, and then make spot-adjustments to the last block, and just run that block without needing to recompute the value of codes.
It’s a bunch of REPLs mixed with documentation in one interactive sandbox. Quite magical! Quite useful!
One thing caught me off guard: as I said earlier I use asdf to allow me to install multiple rubies on my MacBook. However, the IRuby register method only manages a single ruby install at a time.
$ iruby register
/Users/d/Library/Jupyter/kernels/ruby/kernel.json already exists!
Use --force to force a register.
I decided to take a peek at what was going on with the register command. It creates a directory with config files.
$ ls /Users/d/Library/Jupyter/kernels/ruby/
kernel.css      kernel.js       kernel.json     logo-32x32.png  logo-64x64.png
$ cat /Users/d/Library/Jupyter/kernels/ruby/kernel.json | jq .
{
  "argv": [
    "/Users/d/.asdf/installs/ruby/2.7.1/bin/iruby",
    "kernel",
    "{connection_file}"
  ],
  "display_name": "Ruby 2.7.1",
  "language": "ruby"
}
Hmm 🤔, can I copy the directory that the register creates…
$ cp -a ruby ruby3
…modify the new ruby3/kernel.json file…
{
  "argv": [
    "/Users/d/.asdf/installs/ruby/3.1.1/bin/iruby",
    "kernel",
    "{connection_file}"
  ],
  "display_name": "Ruby 3.1.1",
  "language": "ruby"
}
…and see both Ruby versions available as kernels in Visual Studio Code?

Nice! Now I can play with the new features in 3.1.1 while supporting legacy projects in the meantime.
About Mission Data
We’re designers, engineers, and strategists building innovative digital products that transform the way companies do business. Learn more: https://www.missiondata.com.


